We can’t talk about what we’re doing, so we’re talking about the people doing the work. Today, meet Susan Jessup, who is going to show you the tools and the mind of a brilliant character artist. Game illustrations are all from Moonrise since we…can’t talk about what we’re doing, let alone post pictures of it. — Sanya
Building Characters
by Susan Jessup
If you’re attracted to character art, you probably look at animals and people in a different way. You might look at your pet dog and see her with no skin, bounding around as a mass of muscle and sinew. You observe tension and flexion, and marvel at the biological machine before you.
Skeletons aren’t the cast off mortal coil, but the framework of life- the support structure which anchors muscle, protects organs, encases systems, and is woven throughout an entire microcosm of parasitic, mycological, and bacterial biota.
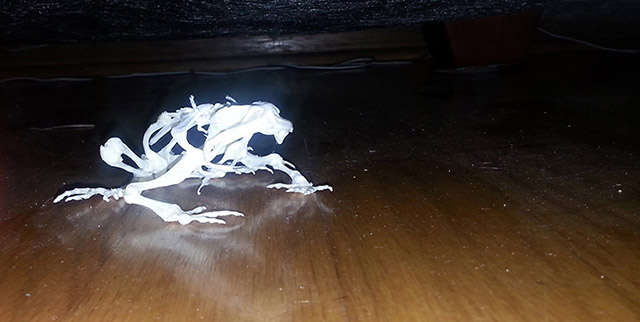
Study the Concept and Gather Reference
My job here at the Lab usually starts when I am given a beautiful piece of concept art from Ocala or Doug. I’ll study it and ask for clarification on anything I’m not sure about. I then gather reference in the form of digital images, books and magazines, legally acquired deceased creatures, and toys. What I’m looking for depends on the project; I might need help picturing a leg in three dimensions, I might wonder what the inside of a mouth or the bottom of a hoof looks like, or I might just want a really cool picture to inspire (or scare) me while I work.
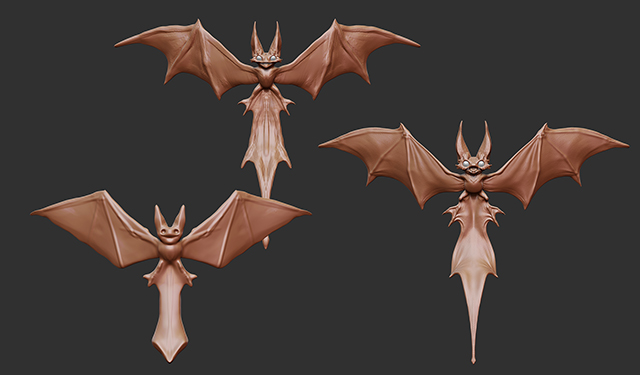
Sculpt and Paint the High Rez Model
Once I’ve arranged my reference about me and pet my freeze-dried mole for luck, I dive into the sculpt. I use a Wacom Cintiq which allows me to draw directly onto its surface with a pressure-sensitive stylus. Coming from a traditional art background, this feels very natural to me, and helps me sculpt faster in Zbrush, the sculpting program of choice for our department.
I always keep a copy of the concept up to make sure I’m not drifting from the silhouette and mood. I’ll also import it directly into the sculpting program and line my model up against it to get back in line. I adore the concepts I’m given and consider myself lucky to flesh them out into 3D form.
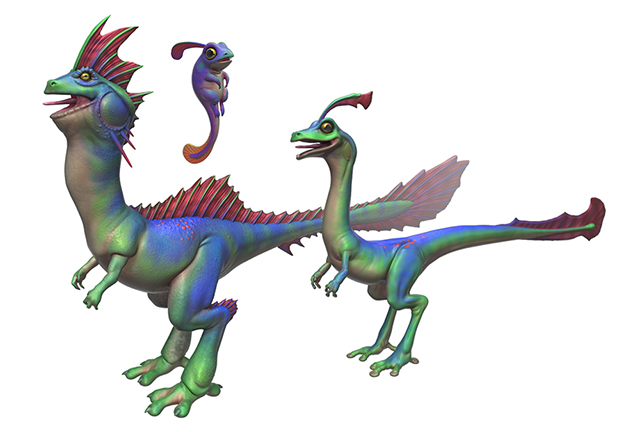
At some point, what started out as a horrifying blob now resembles the concept. I’ll ask fellow character artist Scott and my Art Director (Doug) to take a look, and they’ll catch things I missed or offer suggestions to improve the model. After incorporating the feedback, I’ll paint the model and seek final approval.
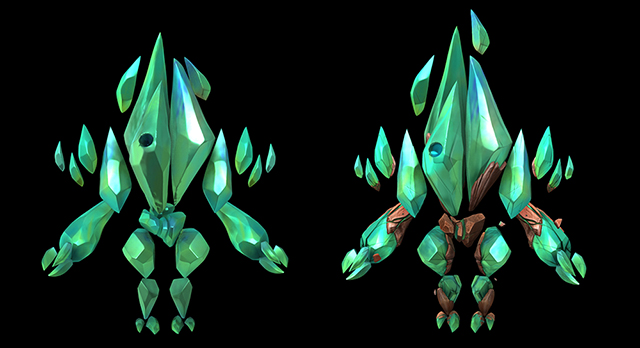
Going Off-Concept
Sometimes I’m asked to make some model changes based on aesthetic, design, or animation reasons. I may be given a quick sketch or notes, but time is often short and I’m asked to just improvise.
Pipeline Evolution
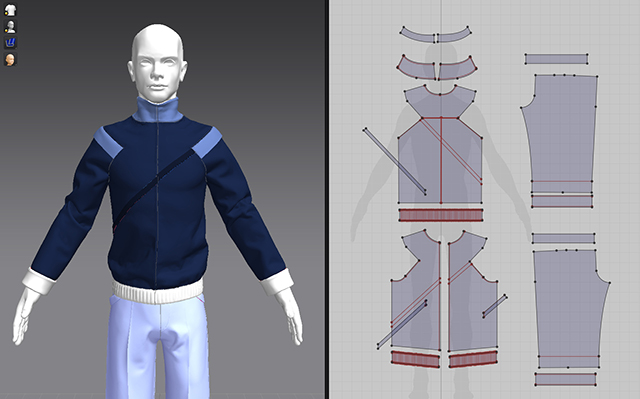
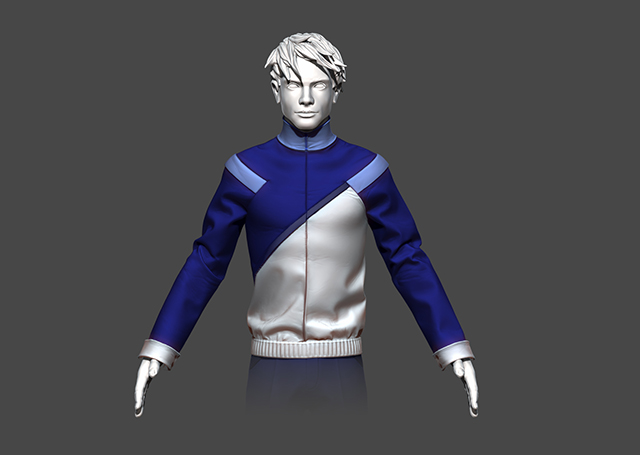
In this industry, one must expect changes to the production pipeline. One example occurred in our department during the Moonrise project. We knew of a program called Marvelous Designer from industry friends. Originally developed for pattern design in the fashion industry, it has integrated cloth simulation, so you can see your patterns fully sewn and fitted into a 3D character. Once fitted, you can yank, tug, pin, and resew the cloth garment until you’re pleased with the overall shape and how the wrinkles fall. From there, you can export your garment into another 3D program for finishing.
Why use a sewing program for creating game assets? In the same amount of time it takes us to sculpt a single coat, we can construct a garment and get several versions of it in different states. Sculpting convincing cloth wrinkles is tedious (for me), and often leads to safe choices that are visually subdued. As we’ve become more familiar with pattern construction (not a traditional character art skill,) we’ve gotten more ambitious about the types of cloth projects we take on.
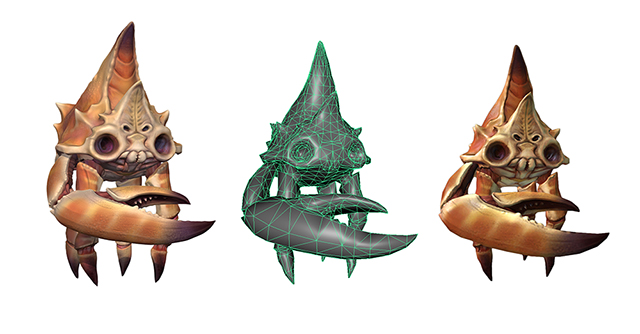
Build the Game Mesh
When the high rez model is complete, we’re only about a third of the way finished. The polygon count on these models is much too high to work in-game. For example, Pesterclaw’s high polygon model is… wow, close to 6 million polygons?! (Don’t tell anybody.) Our in-game polygon budget per creature for Moonrise was capped at about 4,000 polygons. That’s a lot of polys to trim!
You could take your high rez model and use software to automatically reduce it for you. We sometimes start construction of the game mesh that way, but that yields a mesh with lots of undesirable geometry. Our characters need to animate cleanly, and you don’t want to see horrible stretching or deformation, so we use retopology software such as Zbrush’s built in topology brush, or 3D-Coat. This allows us to keep a copy of our high rez mesh underneath while we build clean geometry right over the top of it. The new geometry snaps to the surface of our reference mesh, kind of like a new skin.
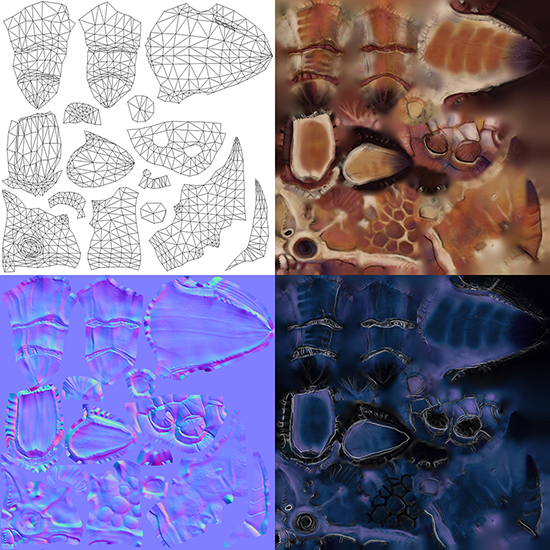
Unwrap the Model
At this point we have a mesh that’s almost ready to go into the game. But it’s only a blank mesh and needs a texture. The process of prepping our models for baking textures is called UV unwrapping. If you take a stuffed animal, snip it apart at its seams and lay all the pieces flat on the ground, you’ll find it’s a similar process. However, we’re deciding where the seams are, and arranging those pieces to fit into a specifically defined area.
Bake the Textures
Now it’s time to get textures onto the still blank model. Again, there are many programs to do this in, but we use a free program called xNormal. Our high polygon mesh is our source, and our newly unwrapped mesh is our target. We want all of the fine details from our source to be projected onto our in-game model. Different game engines call for various types of texture maps, to render your character correctly in-game. For Moonrise, we needed normal maps, which carry information to fake high rez detail and curvature, diffuse maps, which carry color information, and specular maps, which carry information about how shiny or rough a surface is, along with the shine color.
Apply Texture Maps To the Model and Export Into the Engine
Once I have my raw maps, I bring them into Photoshop and tweak them before applying them onto my model in Maya. I can view my model from every angle and find any bad areas. I usually need to adjust my model and rebake the textures until I get a fairly clean result. Next, I export the model and plop it into a test level. I continue to refine the textures until the model looks good under neutral lighting.
The Model Gains a Soul
I now have a completed model that looks good when dropped into the game engine. But it’s static and looks frozen or dead. In order for it to really take on character and come to life, it needs the tender magic of a rigging artist and an animator. It may be a few weeks or even months before I see the model bouncing around in game, and it’s a very special treat I look forward to. The completed characters surprise and delight me in amazing ways, and it’s a testament to the skills of the team around me.
Some Character Artist Do’s and Don’ts
If you are interested in character art, here are some things you might consider.
Do: Seek out local fauna and observe them wherever available.
Don’t: Let a security guard or police officer catch you scraping local fauna off the street with a stick.
Do: Draw, sculpt, and even dissect animals to gain a better understanding of their biology.

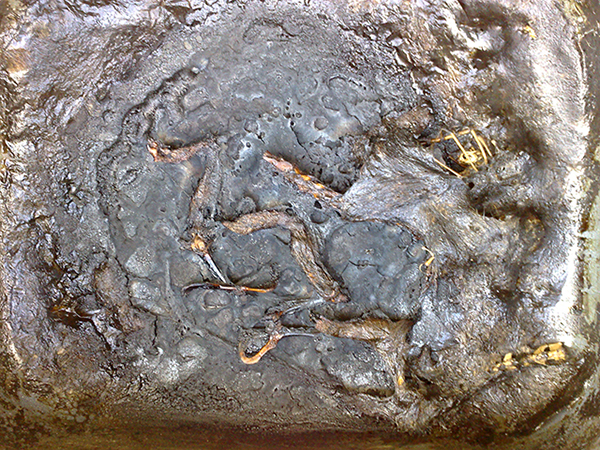
Don’t: Boil them in a pot to extract their skeletons, forget you were doing that, and fuse them permanently to the bottom of a borrowed pot.
Do: Read books, watch tutorials, and take classes to advance your skills and craft.
Don’t: Get discouraged when comparing yourself to other artists. I get depressed at least a few times a week when I see all of the incredible work out there. Blow your nose and get back to your sketchbook or computer. It’s a really fun time to be an artist. New tools are constantly being developed, and there’s a giant catalog of media stretching back centuries to pull from and try out. Have fun exploring and learning!
Susan Jessup is a character artist at Undead Labs. She refuses to be pictured, but instead wishes that you imagine her adorable puppy with no skin.